Quick Answer: Security Camera Installation Checklist
| Installation Stage | Important Checks |
|---|---|
| Planning | Coverage, camera locations, viewing angles, lighting and mounting positions |
| Equipment | Cameras, recorder, storage, cables, power supplies, switches and mounting hardware |
| Pre-installation | Power, live video, network connection and recording |
| Cabling | Correct cable type, routing, protection, connectors and weather sealing |
| Mounting | Secure mounting, correct height, angle and field of view |
| Configuration | Password, time, resolution, recording, detection and network settings |
| Testing | Day/night image, recording, playback, motion detection and remote viewing |
| Security | Strong passwords, firmware, secure remote access and privacy settings |
| Final inspection | Every camera and every critical system function passes testing |
1. Security Camera Planning Checklist
Complete the planning stage before drilling holes or permanently routing cables.
Coverage
- ☐ Identify entrances and exits.
- ☐ Identify front and rear doors.
- ☐ Identify garage entrances.
- ☐ Identify driveways.
- ☐ Identify gates and access paths.
- ☐ Identify vulnerable outdoor areas.
- ☐ Identify important indoor areas.
- ☐ Identify areas requiring package or delivery monitoring.
- ☐ Identify areas where cameras could be useful for general situational awareness.
Field of View
- ☐ Determine the required field of view for each camera.
- ☐ Check whether the camera is wide-angle, standard, telephoto, varifocal, or PTZ.
- ☐ Determine whether a wide view or greater detail is more important.
- ☐ Check potential blind spots.
- ☐ Check for obstructions.
- ☐ Avoid unnecessary areas consuming most of the image.
2. Camera Location Checklist
For every proposed camera location, verify the physical environment.
- ☐ Mounting surface is strong enough.
- ☐ Camera can be securely fastened.
- ☐ Power is available or can be routed safely.
- ☐ Network connectivity is available where required.
- ☐ Ethernet or coaxial cable can be routed safely.
- ☐ Camera will not be easily obstructed.
- ☐ Camera is not unnecessarily exposed to tampering.
- ☐ Lens has a suitable view of the target area.
- ☐ Strong direct sunlight is considered.
- ☐ Nighttime lighting conditions are considered.
- ☐ Rain and water exposure are considered for outdoor cameras.
3. Camera Height Checklist
Camera height should balance coverage, image quality, accessibility, and resistance to tampering.
- ☐ Camera is high enough to reduce easy tampering.
- ☐ Camera is not mounted so high that faces become difficult to identify.
- ☐ Important foreground areas remain visible.
- ☐ The camera is not aimed excessively toward the sky.
- ☐ The camera is not aimed excessively toward the ground.
- ☐ The mounting height is appropriate for the camera’s intended purpose.
4. Outdoor Camera Checklist
Outdoor installations require additional protection against environmental conditions.
- ☐ Camera is rated for the intended outdoor environment.
- ☐ Weather-resistant enclosure is properly installed.
- ☐ Cable entry points are sealed.
- ☐ Connectors are protected from water.
- ☐ Drip loops are used where appropriate.
- ☐ Cable is protected from physical damage.
- ☐ Camera is not unnecessarily exposed to direct water runoff.
- ☐ Condensation risk has been considered.
- ☐ Outdoor junction boxes are appropriately protected.
- ☐ Lightning and surge protection requirements have been considered.
5. Camera Equipment Checklist
Before installation, confirm that all required components are available.
- ☐ Security cameras
- ☐ NVR or DVR if required
- ☐ Hard drive or other supported storage
- ☐ PoE switch if required
- ☐ Ethernet cables
- ☐ Coaxial cables for compatible analog systems
- ☐ Power supplies
- ☐ UPS if required
- ☐ Surge protection
- ☐ Mounting brackets
- ☐ Screws and anchors
- ☐ Weatherproof junction boxes where needed
- ☐ Cable clips or cable management hardware
- ☐ Appropriate tools
6. Camera Compatibility Checklist
Compatibility problems can prevent an otherwise functional camera from working correctly with the rest of the system.
| Component | Check |
|---|---|
| Camera | Compatible with recorder or network architecture |
| PoE camera | Compatible PoE power source |
| NVR | Supported camera resolution and protocols |
| DVR | Compatible camera format and resolution |
| Storage | Supported drive type and capacity |
| Wi-Fi camera | Compatible wireless network requirements |
| Mobile application | Compatible operating system and camera/recorder |
7. Pre-Installation Camera Test Checklist
Test cameras before permanently mounting them whenever practical.
- ☐ Camera powers on.
- ☐ Live video appears.
- ☐ Image is stable.
- ☐ Lens is clean.
- ☐ Image is sufficiently sharp.
- ☐ Camera reaches the intended resolution.
- ☐ Network connection is stable.
- ☐ Recording works.
- ☐ Playback works.
- ☐ Motion detection works.
- ☐ Audio works if required.
- ☐ Night mode works if it can be tested.
8. Ethernet Cable Installation Checklist
For wired IP camera systems, cable installation is one of the most important parts of the installation.
- ☐ Correct Ethernet cable category selected.
- ☐ Cable length is within the intended Ethernet limit.
- ☐ Cable is routed away from unnecessary sources of interference.
- ☐ Cable is not sharply bent.
- ☐ Cable is not crushed or excessively stretched.
- ☐ Cable is secured properly.
- ☐ Outdoor cable is suitable for the installation environment.
- ☐ Connectors are correctly terminated.
- ☐ Cable labels are installed.
- ☐ Each cable is tested after termination.
9. Cable Labeling Checklist
Label both ends of every cable. This becomes increasingly important as the number of cameras increases.
| Camera Label | Suggested Description |
|---|---|
| CAM-01 | Front Door |
| CAM-02 | Driveway |
| CAM-03 | Rear Door |
| CAM-04 | Garage |
Use the same camera names in the NVR/DVR, mobile application, cable labels, installation documentation, and network documentation.
10. PoE Installation Checklist
For PoE systems, verify both data connectivity and power delivery.
- ☐ PoE switch or NVR PoE ports are compatible with the cameras.
- ☐ PoE power budget is sufficient for all connected cameras.
- ☐ Individual ports provide adequate power.
- ☐ Ethernet cables are properly terminated.
- ☐ Camera link LEDs behave as expected.
- ☐ Cameras remain powered continuously.
- ☐ PTZ cameras have sufficient power if applicable.
- ☐ IR/nighttime power requirements have been considered.
11. Wi-Fi Camera Installation Checklist
- ☐ Wi-Fi signal is adequate at the final camera location.
- ☐ Camera remains connected for an extended test.
- ☐ Video does not repeatedly freeze.
- ☐ Camera can reach the intended network.
- ☐ Wi-Fi password is correct and securely stored.
- ☐ Router/access-point location has been considered.
- ☐ Nearby walls and obstacles have been considered.
- ☐ Camera does not depend on an unreliable signal.
12. Power Installation Checklist
- ☐ Correct power supply is being used.
- ☐ Voltage is compatible with the camera.
- ☐ Polarity is correct for DC-powered equipment.
- ☐ Power connector is secure.
- ☐ Cable is adequately sized for the installation.
- ☐ Voltage-drop risk has been considered for long cable runs.
- ☐ Outdoor power connections are appropriately protected.
- ☐ UPS requirements have been considered.
- ☐ Surge protection requirements have been considered.
13. Mounting Checklist
- ☐ Mounting surface is structurally suitable.
- ☐ Correct anchors are used for the surface.
- ☐ Mounting screws are tightened properly.
- ☐ Bracket does not move under normal conditions.
- ☐ Camera is securely attached to the bracket.
- ☐ Cable is not pulling on the camera connector.
- ☐ Camera can be adjusted to the intended angle.
- ☐ Camera cannot easily rotate out of position.
14. Camera Angle Checklist
- ☐ Target area is centered appropriately.
- ☐ Important areas are not outside the field of view.
- ☐ Excessive sky is avoided.
- ☐ Excessive ground is avoided.
- ☐ Nearby walls do not occupy excessive image area.
- ☐ Trees and vegetation do not block important areas.
- ☐ Vehicles are not expected to permanently obstruct the view.
- ☐ Camera captures useful perspectives of people approaching the property.
15. Daytime Image Checklist
- ☐ Image is sharp enough for the intended purpose.
- ☐ Important details are visible.
- ☐ Exposure is acceptable.
- ☐ Bright areas are not excessively blown out.
- ☐ Dark areas retain useful detail.
- ☐ Backlighting has been tested.
- ☐ Glare has been checked.
- ☐ Motion blur is acceptable.
16. Nighttime Image Checklist
- ☐ IR illumination activates correctly.
- ☐ Night image is sufficiently sharp.
- ☐ Required areas are visible.
- ☐ IR reflection has been checked.
- ☐ Nearby walls do not cause excessive IR glare.
- ☐ Windows do not create unacceptable reflections.
- ☐ Headlights do not make the image unusable.
- ☐ Motion blur is acceptable.
- ☐ Identification requirements are satisfied at night.
17. Camera Configuration Checklist
- ☐ Default password changed.
- ☐ Strong unique password configured.
- ☐ Camera name configured.
- ☐ Date configured.
- ☐ Time configured.
- ☐ Correct time zone selected.
- ☐ Time synchronization configured.
- ☐ Resolution configured.
- ☐ Frame rate configured.
- ☐ Bitrate configured.
- ☐ Codec configured appropriately.
- ☐ Image orientation configured.
- ☐ WDR configured where required.
- ☐ Day/night mode configured.
- ☐ IR settings checked.
- ☐ Privacy masks configured where necessary.
18. Recording Configuration Checklist
- ☐ Recording is enabled.
- ☐ Correct recording schedule is configured.
- ☐ Continuous recording is configured if required.
- ☐ Motion recording is configured if required.
- ☐ Event recording is configured if required.
- ☐ Pre-event recording is configured where supported.
- ☐ Post-event recording is configured where supported.
- ☐ Storage device is recognized.
- ☐ Storage health is acceptable.
- ☐ Overwrite behavior is configured appropriately.
- ☐ Retention requirements have been considered.
19. Storage Checklist
Verify that the storage system can accommodate the expected recording workload.
A basic storage estimate can be expressed as:
Storage ≈ Bitrate × Number of Cameras × Recording Time
For a more practical calculation, include the appropriate unit conversions and allow additional capacity for system overhead and variations in actual bitrate.
- ☐ Storage capacity is adequate.
- ☐ Hard drive is recognized.
- ☐ Drive health is checked.
- ☐ Recording retention is appropriate.
- ☐ Automatic overwrite is configured if required.
- ☐ Storage failure alerts are enabled where supported.
20. Motion Detection Checklist
- ☐ Motion detection is enabled where required.
- ☐ Detection zones are correctly positioned.
- ☐ Sensitivity is appropriate.
- ☐ Important movement is detected.
- ☐ Unwanted areas are excluded where possible.
- ☐ False alerts have been tested.
- ☐ Person detection is configured if supported.
- ☐ Vehicle detection is configured if supported.
- ☐ Detection schedules are configured where required.
21. NVR Installation Checklist
- ☐ NVR is installed in a suitable location.
- ☐ Adequate ventilation is available.
- ☐ Hard drive is installed correctly.
- ☐ All required cameras are connected.
- ☐ Every camera appears on the correct channel.
- ☐ Recording works for every camera.
- ☐ Playback works for every camera.
- ☐ Network connection is working.
- ☐ Remote access is configured if required.
- ☐ NVR time is correct.
- ☐ Firmware is appropriately maintained.
22. DVR Installation Checklist
- ☐ DVR is installed in a suitable location.
- ☐ Hard drive is recognized.
- ☐ Cameras are connected to the correct channels.
- ☐ Video format is compatible.
- ☐ Recording is enabled.
- ☐ Playback works.
- ☐ Date and time are correct.
- ☐ Network access works where required.
- ☐ Remote viewing works where required.
23. Network Configuration Checklist
- ☐ Camera IP configuration is correct.
- ☐ NVR/DVR network configuration is correct.
- ☐ Router connection is working.
- ☐ PoE switch connection is working.
- ☐ IP conflicts have been checked.
- ☐ Network bandwidth is adequate.
- ☐ Wi-Fi coverage is adequate for wireless cameras.
- ☐ Remote access has been tested.
24. Remote Viewing Checklist
- ☐ Mobile application is installed.
- ☐ Correct account is configured.
- ☐ Camera or recorder is added correctly.
- ☐ Live remote video works.
- ☐ Remote playback works.
- ☐ Event notifications work.
- ☐ Remote access has been tested outside the home Wi-Fi network.
- ☐ Unnecessary remote-access features are disabled where appropriate.
25. Security Checklist
Security configuration should be treated as part of installation rather than an optional final step.
- ☐ Default passwords have been changed.
- ☐ Strong unique passwords are used.
- ☐ Administrative accounts are protected.
- ☐ Firmware is updated appropriately.
- ☐ Unnecessary services are disabled.
- ☐ Remote access is configured securely.
- ☐ Unnecessary port exposure is avoided.
- ☐ Privacy settings are reviewed.
- ☐ Camera access is limited to authorized users.
26. Privacy Checklist
- ☐ Camera does not unnecessarily monitor private areas.
- ☐ Neighboring properties are not unnecessarily included.
- ☐ Privacy masks are used where appropriate.
- ☐ Audio recording is enabled only when appropriate.
- ☐ Local privacy and surveillance requirements have been considered.
- ☐ Authorized users are identified.
27. Recording and Playback Test Checklist
- ☐ Trigger an event.
- ☐ Confirm recording starts.
- ☐ Confirm the correct camera records.
- ☐ Verify the timestamp.
- ☐ Locate the event in playback.
- ☐ Play the recording.
- ☐ Verify image quality.
- ☐ Verify audio if applicable.
- ☐ Export a sample recording.
- ☐ Confirm the exported file can be opened.
28. Notification Test Checklist
- ☐ Trigger a controlled motion event.
- ☐ Verify notification is generated.
- ☐ Verify the correct camera name.
- ☐ Verify the correct event type.
- ☐ Verify notification reaches the intended device.
- ☐ Check notification schedules.
- ☐ Adjust false alerts if necessary.
29. Power Failure Test Checklist
Where it is safe to do so, test how the surveillance system behaves after a controlled power interruption.
- ☐ Camera restarts correctly.
- ☐ NVR/DVR restarts correctly.
- ☐ Network equipment restarts correctly.
- ☐ Cameras reconnect.
- ☐ Recording resumes.
- ☐ Remote access returns.
- ☐ No persistent configuration loss occurs.
30. Final Camera-by-Camera Checklist
| Test | Camera 1 | Camera 2 | Camera 3 | Camera 4 |
|---|---|---|---|---|
| Power | ☐ | ☐ | ☐ | ☐ |
| Live video | ☐ | ☐ | ☐ | ☐ |
| Correct angle | ☐ | ☐ | ☐ | ☐ |
| Day image | ☐ | ☐ | ☐ | ☐ |
| Night image | ☐ | ☐ | ☐ | ☐ |
| Recording | ☐ | ☐ | ☐ | ☐ |
| Playback | ☐ | ☐ | ☐ | ☐ |
| Motion detection | ☐ | ☐ | ☐ | ☐ |
| Notifications | ☐ | ☐ | ☐ | ☐ |
| Remote viewing | ☐ | ☐ | ☐ | ☐ |
31. Final System-Wide Checklist
- ☐ Every camera has been tested.
- ☐ Every camera has the correct name.
- ☐ Every camera has the correct viewing angle.
- ☐ All important areas are covered.
- ☐ Major blind spots have been identified.
- ☐ Daytime image quality is acceptable.
- ☐ Nighttime image quality is acceptable.
- ☐ Recording works.
- ☐ Playback works.
- ☐ Storage is healthy.
- ☐ Timestamps are correct.
- ☐ Motion detection works.
- ☐ Person/vehicle detection works where applicable.
- ☐ Notifications work.
- ☐ Remote viewing works.
- ☐ Video export works.
- ☐ Power-loss recovery has been checked.
- ☐ Camera passwords are secured.
- ☐ Recorder password is secured.
- ☐ Firmware status has been reviewed.
- ☐ Privacy settings have been reviewed.
- ☐ Outdoor cable and connector protection has been checked.
32. Security Camera Installation Documentation
After completing the installation, keep a simple record of the system.
| Information | Record |
|---|---|
| Camera number | CAM-01, CAM-02, etc. |
| Camera location | Front door, driveway, garage, etc. |
| Camera model | Model number |
| Connection | PoE, Wi-Fi, coaxial, etc. |
| Recorder channel | Channel number |
| IP address | Where relevant |
| Installation date | Date |
| Firmware version | Installed version |
| Recording mode | Continuous, motion, event, etc. |
Do not store passwords in an unsecured installation document. Keep credentials in a secure password manager or another appropriately protected system.
33. Quick Security Camera Installation Decision Checklist
| Question | If Yes | If No |
|---|---|---|
| Does the camera cover the required area? | Continue | Adjust location or angle |
| Is the daytime image clear? | Continue | Adjust focus/settings/location |
| Is the nighttime image usable? | Continue | Investigate lighting/IR/position |
| Does recording work? | Continue | Check recorder/storage/settings |
| Does playback work? | Continue | Check recording/storage |
| Does detection work? | Continue | Adjust detection settings |
| Does remote viewing work? | Continue | Check network/remote access |
| Are credentials secured? | Installation is more secure | Change credentials immediately |
34. Frequently Asked Questions
What should I check before installing a security camera?
Check the camera for physical damage, verify power and network compatibility, test live video, verify recording and playback, and confirm that the proposed location provides the required field of view.
What should I check after installing security cameras?
Check mounting stability, camera angle, field of view, daytime and nighttime image quality, recording, playback, motion detection, storage, timestamps, notifications, remote access and power-loss recovery.
Should I test security cameras before mounting them?
Yes. Testing before permanent installation can identify defective hardware, cable problems, compatibility issues and configuration problems before the camera is difficult to access.
How do I know if my security camera installation is complete?
The installation is complete when every camera has the required coverage and image quality and the complete system successfully records, stores, plays back, detects events, sends required notifications and provides the intended remote access.
Should security cameras be tested at night?
Yes. Night testing is important because infrared reflections, glare, low-light noise, motion blur and exposure problems may not appear during daytime testing.
What is the most commonly missed security camera installation check?
Recording and playback are commonly overlooked. A live image does not guarantee that footage is actually being recorded and stored correctly.
Should I label security camera cables?
Yes. Labeling both ends of every cable makes troubleshooting, maintenance and future upgrades much easier, particularly on systems with multiple cameras.
Do Wi-Fi cameras need to be tested at their final location?
Yes. Wi-Fi performance can change substantially because of walls, distance, interference and other physical conditions. Test the camera where it will actually be installed.
Should I use a UPS for a security camera system?
A UPS can keep cameras, network equipment and recorders operating during short power interruptions, provided the UPS has sufficient capacity and the equipment is connected appropriately.
What should I document after installing security cameras?
Record each camera’s location, model, connection type, recorder channel, relevant network information, installation date, firmware version and recording configuration. Store passwords separately and securely.
35. Final Recommendation
A good security camera installation should be treated as a complete system rather than simply a collection of mounted cameras. The final checklist should confirm coverage, mounting, cabling, power, network connectivity, image quality, nighttime performance, recording, storage, detection, notifications, remote access, security and recovery after interruptions.
For the highest confidence, perform the final inspection during both daytime and nighttime conditions. Test every camera individually, then test the entire system together. Once everything passes, document the installation so that future troubleshooting and maintenance can be performed quickly.
Security Camera Installation Guide — Supporting Articles
- Security Camera Placement: Where to Install, Mounting Height, Angle, FOV and Blind Spots
- How to Run Ethernet Cable for Security Cameras
- How to Hide and Protect Security Camera Wires
- How to Mount Security Cameras: Brick, Concrete, Siding, Soffits, Eaves and Poles
- How to Install a PoE Switch for Security Cameras
- How to Connect PoE Security Cameras to an NVR
- How to Connect and Configure IP Security Cameras on a Home Network
- How to Install an NVR Security Camera System
- How to Install a DVR Security Camera System
- Security Camera Power Installation: PoE, DC, AC, USB, Battery and Solar
- How to Protect Security Cameras From Power Outages and Surges
- How to Configure Security Cameras After Installation
- How to Test Security Cameras Before and After Installation
- Security Camera Installation Checklist
- How to Set Up Remote Viewing for Security Cameras
- Security Camera Installation Security: Passwords, Firmware, Remote Access and Privacy
- Security Camera Installation Troubleshooting: No Power, No Video, Offline and Connection Problems
- Security Camera Image and Recording Troubleshooting
Security Camera buying guides

About the Author
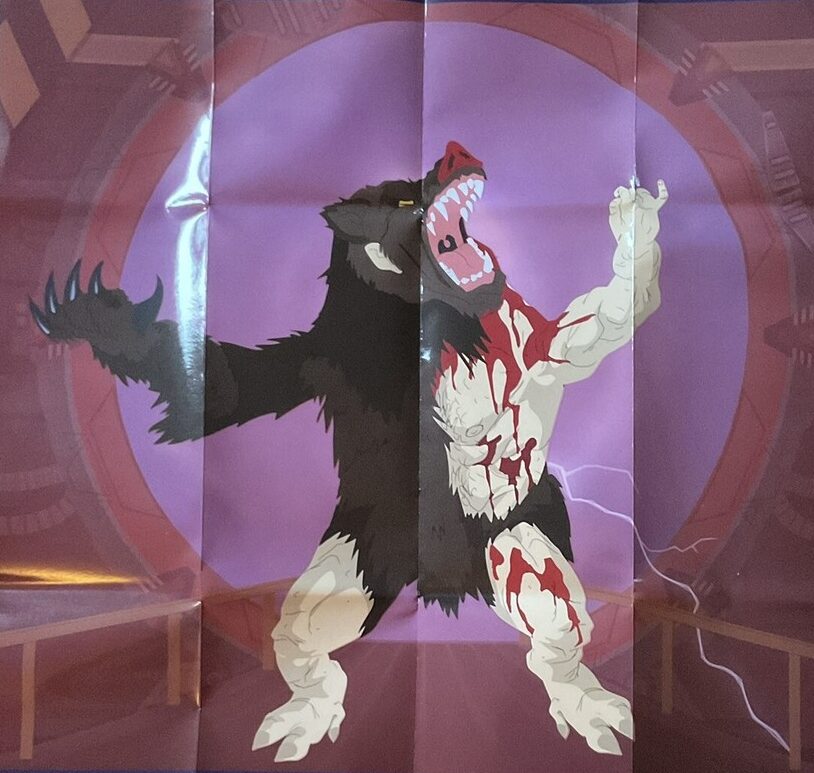
ManBearPig is a part-man, part-bear, part-pig creature and a full-time expert on global warming—mostly because he has personally experienced the consequences of being extremely, extremely, super cereal.
When he isn’t roaming the wilderness, terrorizing unsuspecting humans, or demanding that people take climate change seriously, ManBearPig studies rising temperatures, melting ice, extreme weather, carbon emissions, and other inconvenient signs that the planet may not be particularly happy with us.
His research philosophy is simple:
“I’m super cereal.”
ManBearPig believes climate change is too important to discuss without facts—and too ridiculous to discuss without a little humor. Through this website, he explores global warming, climate science, environmental changes, energy, and the strange ways humans respond when their own planet starts sending them warning signals.
He has no university degree, no laboratory, and absolutely no intention of becoming a respectable academic.
But he does have hooves, claws, a snout, and an unusually strong opinion about melting ice.